

 Veselin Stoyanov12 min read
How to Automate Your Next.js Sitemap for Rapid Indexing
Learn how to automate a Next.js sitemap, include dynamic blog URLs, avoid common SEO errors, and publish new pages with less manual work.

How to Automate Your Next.js Sitemap for Rapid Indexing
A reliable next js sitemap helps search engines discover the important URLs on your website. For a blog or content-heavy site, that sitemap should update as new articles are published instead of relying on a developer to edit an XML file by hand.
Next.js provides built-in conventions for generating sitemap.xml, including support for dynamic sitemap data and multiple sitemap files. The technical setup is straightforward, but the real SEO benefit comes from connecting the sitemap to your publishing workflow. If a new article is published but your sitemap still contains yesterday's URL set, search engines may take longer to discover it.
This guide explains how to create a dynamic sitemap in Next.js, connect it to blog content, validate the result, and automate the process for future publications.
What a Next.js sitemap does
A sitemap is an XML document that lists URLs you want search engines to crawl. It can also provide optional information such as a page's last modification date, change frequency, and relative priority.
A sitemap does not guarantee indexing, and it does not replace internal links, useful content, canonical tags, or a technically accessible website. Its job is narrower: it gives crawlers a structured list of discoverable URLs.
For a Next.js blog, the sitemap commonly includes:
- The homepage
- Main category or tag pages
- Published blog posts
- Important landing pages
- Other indexable content types
It should generally exclude private pages, preview URLs, login pages, search-result pages, duplicate URL variants, and content marked as noindex.
The simplest Next.js sitemap with the App Router
With the Next.js App Router, you can create a sitemap by adding a sitemap.ts file inside the app directory. The file exports a function that returns an array of sitemap entries.
// app/sitemap.ts
import type { MetadataRoute } from 'next'

export default function sitemap(): MetadataRoute.Sitemap {
  const baseUrl = 'https://example.com'

  return [
    {
      url: baseUrl,
      lastModified: new Date(),
    },
    {
      url: `${baseUrl}/blog`,
      lastModified: new Date(),
    },
  ]
}
Next.js uses this file convention to serve the generated result at /sitemap.xml. The official Next.js sitemap documentation covers the supported file structure and sitemap entry format.
For a small site with mostly static pages, this may be enough. A blog with frequently changing content needs one additional step: load published posts from your content source and map them into sitemap entries.
Generate a sitemap from dynamic blog posts
Assume your application fetches blog articles from an API, database, CMS, or local content collection. Your sitemap function can retrieve the published records and convert each article's canonical path into a URL.
// app/sitemap.ts
import type { MetadataRoute } from 'next'

const baseUrl = 'https://example.com'

type Post = {
  slug: string
  updatedAt?: string
}

async function getPublishedPosts(): Promise<Post[]> {
  const response = await fetch('https://api.example.com/posts?status=published', {
    next: { revalidate: 300 },
  })

  if (!response.ok) {
    throw new Error('Failed to load published posts')
  }

  return response.json()
}

export default async function sitemap(): Promise<MetadataRoute.Sitemap> {
  const posts = await getPublishedPosts()

  const staticPages: MetadataRoute.Sitemap = [
    {
      url: baseUrl,
      lastModified: new Date(),
    },
    {
      url: `${baseUrl}/blog`,
      lastModified: new Date(),
    },
  ]

  const postPages: MetadataRoute.Sitemap = posts.map((post) => ({
    url: `${baseUrl}/blog/${post.slug}`,
    lastModified: post.updatedAt ? new Date(post.updatedAt) : new Date(),
  }))

  return [...staticPages, ...postPages]
}
The important details are the same regardless of your content source:
- Fetch only content that should be public and indexable.
- Use the canonical URL pattern used by your article routes.
- Convert valid update timestamps into dates.
- Return a single consistent URL for each page.
- Make sure the sitemap can be generated in the environment where your application runs.
Do not copy an article's draft URL into the sitemap and remove it later. Filter by publication status before generating the entries.
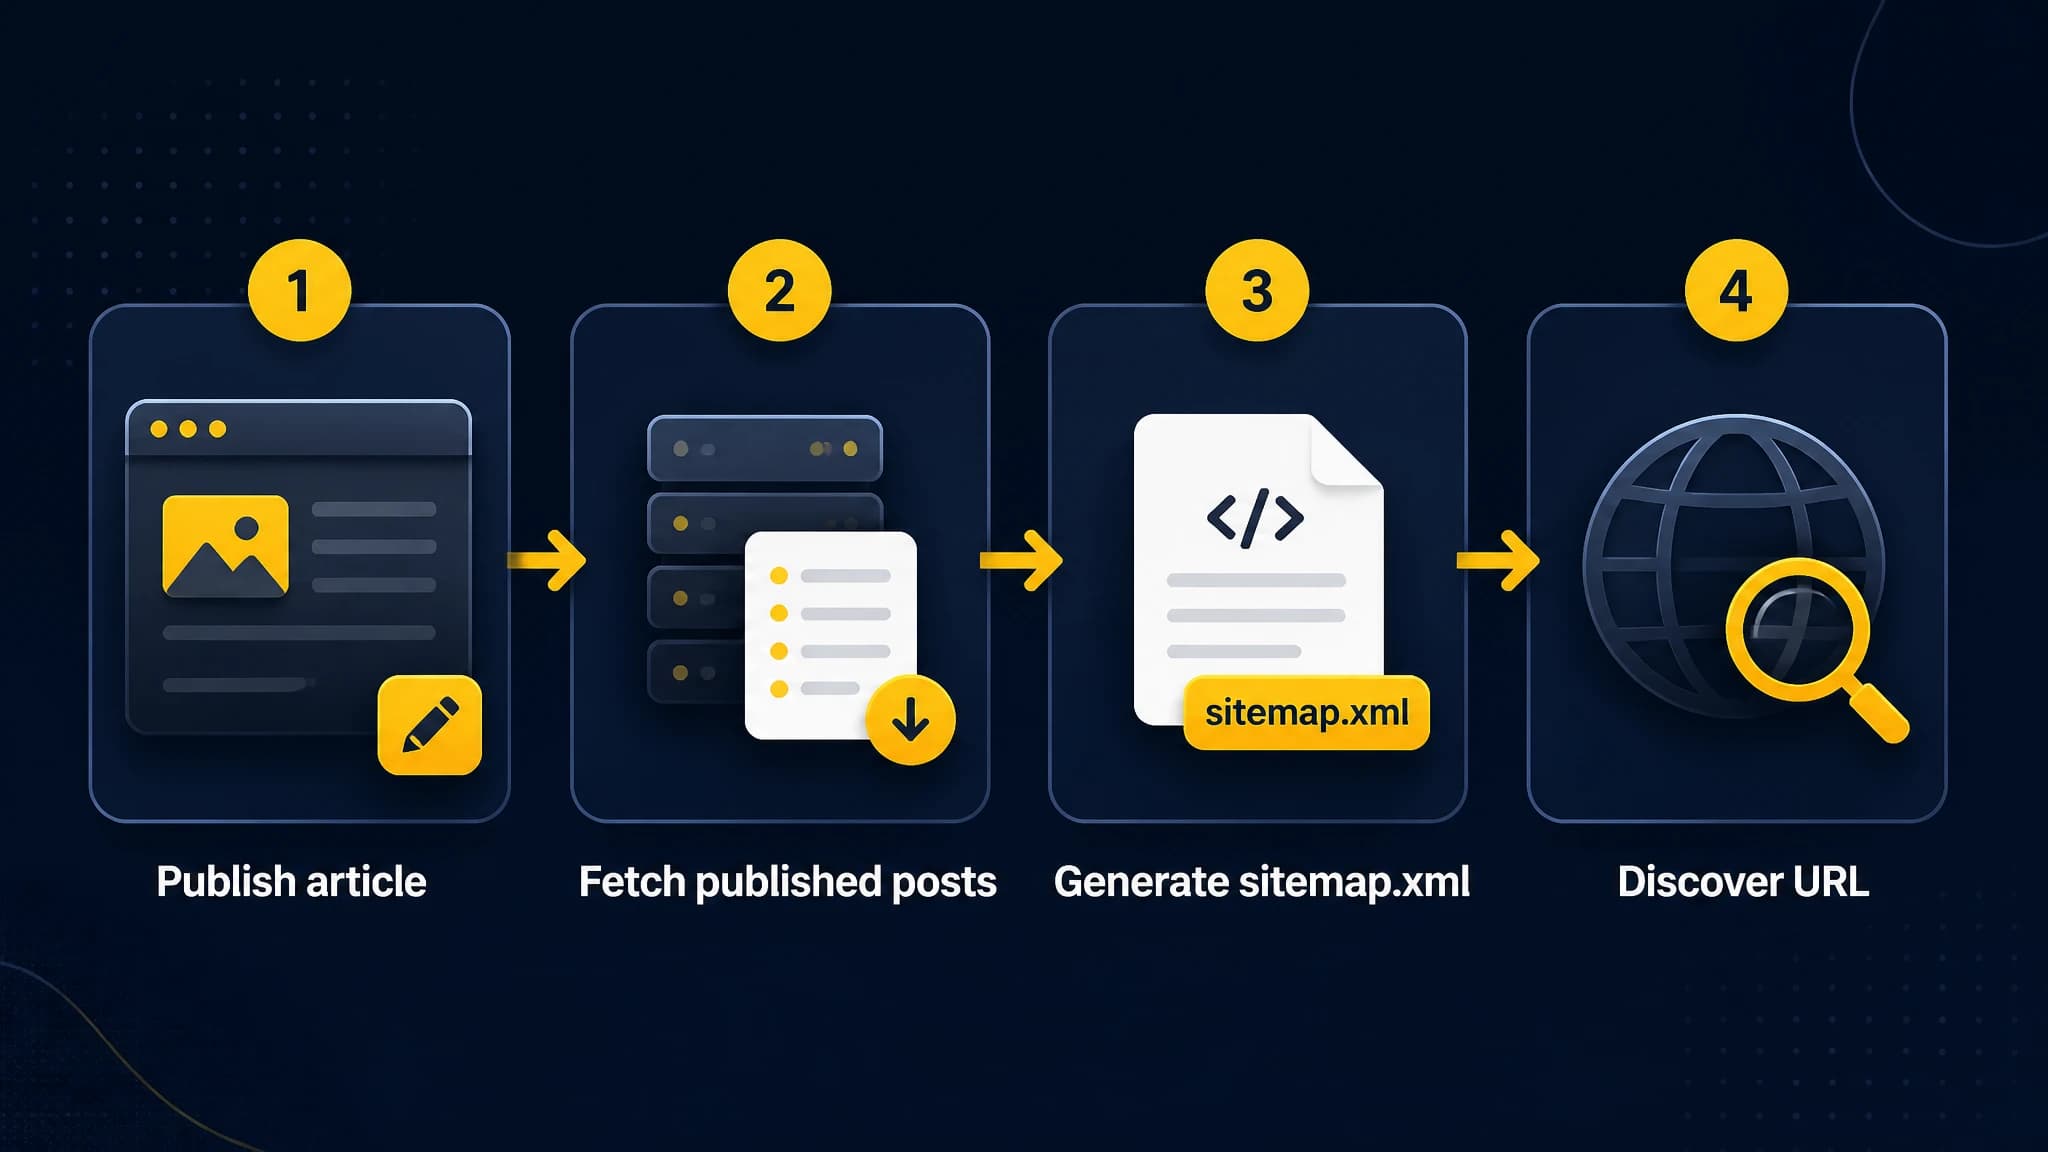
The sitemap should be generated from the same published content source that powers your article routes.
Use stable canonical URLs
Sitemap automation only works well when your URL rules are stable. Before connecting your content source, define the exact URL format for every article.
For example, choose one of these patterns and use it consistently:
/blog/article-slug/articles/article-slug/resources/article-slug
Avoid generating multiple sitemap entries for the same article because of trailing slashes, query parameters, category prefixes, or alternate route formats. The URL in the sitemap should match the canonical URL declared by the page.
Your article route should also handle missing content correctly. If a slug no longer maps to a published article, return a proper 404 response rather than rendering an empty page that remains discoverable.
Sitemap URLs should use the production hostname and HTTPS. Do not generate development, staging, localhost, or preview-domain URLs in production output.
For a broader framework-level checklist, see these Next.js SEO best practices, including rendering, metadata, structured data, and crawlability considerations.
Add lastModified carefully
The lastModified value can help crawlers understand when a URL may have changed. It should represent a meaningful content or page update, not simply the time the sitemap was generated.
A common mistake is to use new Date() for every URL on every request. That makes every page appear freshly changed even when the article itself has not been updated. A content-backed timestamp is more useful:
lastModified: post.updatedAt
  ? new Date(post.updatedAt)
  : undefined
Use the source system's actual publication or update timestamp when available. If the timestamp is missing, omitting the field is usually better than inventing a precise update time.
Also remember that changing lastModified does not force a search engine to recrawl or index a page. It is a supporting signal, not an indexing command.
Split large sitemaps when needed
A single sitemap is convenient for smaller sites. Larger websites may need multiple sitemap files and a sitemap index. Next.js supports generating multiple sitemap files with generateSitemaps.
A common approach is to divide blog posts into batches:
// app/sitemap/[id]/sitemap.ts
import type { MetadataRoute } from 'next'

export async function generateSitemaps() {
  return [{ id: 0 }, { id: 1 }]
}

export default async function sitemap({
  id,
}: {
  id: Promise<{ id: string }>
}): Promise<MetadataRoute.Sitemap> {
  const { id: sitemapId } = await id
  const posts = await getPostsForSitemap(Number(sitemapId))

  return posts.map((post) => ({
    url: `https://example.com/blog/${post.slug}`,
    lastModified: post.updatedAt ? new Date(post.updatedAt) : undefined,
  }))
}
The exact batching strategy depends on your content model. You could partition by numeric ranges, publication periods, content types, or another deterministic key. The key requirement is that every sitemap URL is unique and every published indexable page appears in one sitemap only.
Read the Next.js multiple sitemaps reference before implementing a split sitemap structure, especially if your application uses dynamic route segments.
Make sitemap updates part of publishing
The most dependable workflow is event-driven:
- A new article is approved or published.
- The content source makes the article available to the Next.js application.
- The sitemap data source includes the new slug.
- The deployed or runtime sitemap reflects the new URL.
- Internal links and relevant index pages expose the article to users and crawlers.
This is better than treating the sitemap as a separate maintenance task. The sitemap should be a generated view of your current content state, not a manually maintained list.
If your content is stored in local MDX files, publishing may require a repository update and deployment. If your content is delivered through an API, the application can fetch the current published set during a build or at runtime, depending on your caching strategy.
When using cached data, choose a revalidation approach that matches your publishing requirements. A long cache can delay sitemap updates. A very short cache can increase requests to your content source. The right choice depends on traffic, infrastructure, and how quickly your team needs newly published URLs to appear.
Connect automated publishing to Next.js
For teams publishing SEO content regularly, the content workflow and the sitemap workflow should be designed together. RankWorker's official Next.js integration provides the @rankworker/nextjs-blog library for adding a customizable blog to an existing Next.js application. The integration page states that the library includes article and tag pages, canonical metadata, Open Graph tags, JSON-LD, and blog and image sitemaps.
It supports local MDX as well as RankWorker delivery through the Direct API and webhooks. That means a team can choose a repository-based workflow or connect automated article delivery to its Next.js application. See the RankWorker Next.js integration for the current setup details.
The practical principle is simple: when a new article reaches the same content source used by your sitemap, the URL can become available to the sitemap without a separate manual XML edit. You still need to verify your caching, route generation, publication status, and deployment behavior.
Validate your automated sitemap
Before relying on the sitemap in production, test the complete path from content publication to XML output.
1. Open the production URL
Visit https://example.com/sitemap.xml and confirm that the response is XML, returns successfully, and uses the correct hostname.
2. Check representative URLs
Select several sitemap entries and verify that they resolve to the intended article pages. Check both recently published content and older content.
3. Compare against your content source
Count or sample published records in your CMS or API and compare them with the sitemap. Look for missing posts, drafts, duplicates, and unexpected route variants.
4. Inspect timestamps
Make sure lastModified values reflect actual content updates. Watch for every URL receiving the same current timestamp after every request.
5. Test failure behavior
Temporarily simulate an unavailable content API or malformed record. Decide whether your application should fail the sitemap request, return a static fallback, or use another controlled recovery strategy.
6. Check robots and internal links
Your robots.txt should not block the sitemap or the URLs you want indexed. Each important article should also be reachable through normal site navigation or contextual internal links.
Common Next.js sitemap mistakes
Including drafts and private URLs
A sitemap should describe your public search surface. Filter by publication status and access rules before mapping records.
Using the wrong hostname
Environment variables can accidentally produce staging or preview URLs. Make the production base URL explicit and verify the generated output after deployment.
Regenerating from stale data
A correct sitemap function can still show old results if its fetch cache, CDN, or build process has not refreshed. Document how a publication event invalidates or refreshes the relevant data.
Treating the sitemap as the only discovery mechanism
Search engines also use links, rendered HTML, canonical signals, and other crawl signals. A sitemap is most useful when it complements a well-linked, technically accessible website.
Updating dates without updating content
Do not change an article's update timestamp solely to make it look fresh. Use meaningful editorial changes and record them accurately.
A practical automation checklist
Use this checklist before launching your automated next js sitemap:
-
app/sitemap.tsor the appropriate dynamic sitemap route exists. - Only published, indexable URLs are included.
- URLs match the production canonical URL format.
- HTTPS and the correct hostname are used.
- Duplicate, preview, query, and private URLs are excluded.
-
lastModifiedcomes from a meaningful source timestamp. - Large URL sets are split deterministically when necessary.
- Cache and revalidation behavior is documented.
- New articles appear after the publishing workflow completes.
- The sitemap response is tested in production.
-
robots.txtallows access to the sitemap and target pages. - Important pages are linked from the site, not only listed in XML.
Conclusion
Automating a Next.js sitemap is less about writing XML and more about creating a dependable connection between your content source, routes, caching layer, and publishing process. Generate the sitemap from the same trusted set of published content that powers your article pages, use stable canonical URLs, and validate the production output regularly.
For a growing blog, connect sitemap generation to the content lifecycle. When publishing and URL generation are designed as one workflow, new articles can become discoverable with less manual maintenance and fewer technical SEO gaps.